919-760-6420

Most automotive enthusiasts are familiar with paint correction as a solution to scratched, dull, and uneven paint. What they may not know is how this process works to bring their car’s finish back to life. 

Paint correction doesn’t just buff out or cover up damage. It’s a controlled, highly technical method of refining automotive paint to remove surface defects and restore clarity, depth, and gloss. 

Here’s what you need to know about how this meticulous process turns back the clock on weathered paint. 
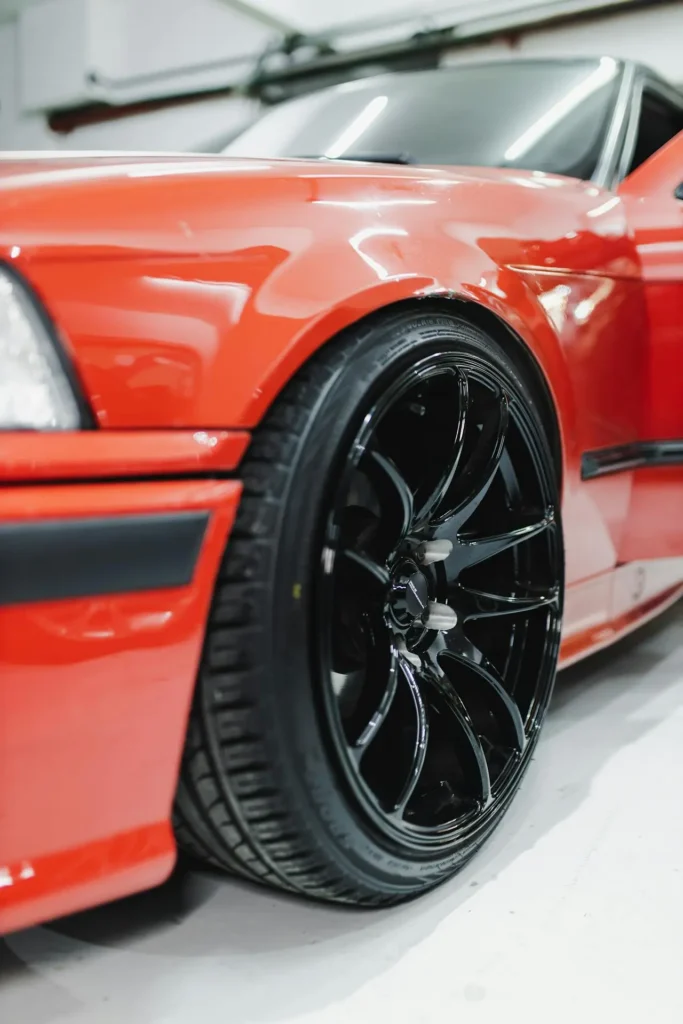
close up of a red sports car that has just undergone professional paint correctionThe Anatomy of Automotive Paint

From eye-popping reds to rich blacks, automotive paint is much more than pigment. Excluding pre-treatments, most finishes are made up of three layers:

Most of the time, minor paint defects like swirl marks, light scratches, oxidation, and etching only impact the clear coat. 

Paint correction works by leveling this outermost layer to carefully remove imperfections so light reflects evenly. In order to do this, a small amount of the clear coat is permanently polished away. 

Given that most clear coats are thinner than a sheet of printer paper, precision, experience, and attention to detail are essential for paint correction. Any clear coat that is removed during polishing can’t be replaced without repainting. 

What Types of Damage Can Paint Correction Fix?

Though it can’t correct deep gashes and body damage, paint correction has a high success rate with many of the imperfections that come from daily driving. 

Swirl Marks

These fine, circular scratches are often caused by improper washing and drying techniques or leftover grime in the automatic car wash. While shallow, they can scatter light and make paint look dull and hazy, especially on dark-colored vehicles.

Light Scratches

When low-hanging tree branches, runaway shopping carts, and loose keys mar your car’s clear coat, paint correction can permanently remove them. 

Oxidation

Over time, UV exposure can cause paint to lose clarity and gloss. Paint correction removes the oxidized layer, restoring brightness and depth.

Water Spots and Etching

Acid rain, bird droppings, and contaminants in reclaimed water can cause a kind of chemical burn on your car’s clear coat known as “etching.” Affected areas show up as unsightly depressions that reflect light unevenly and reduce your paint’s gloss. 

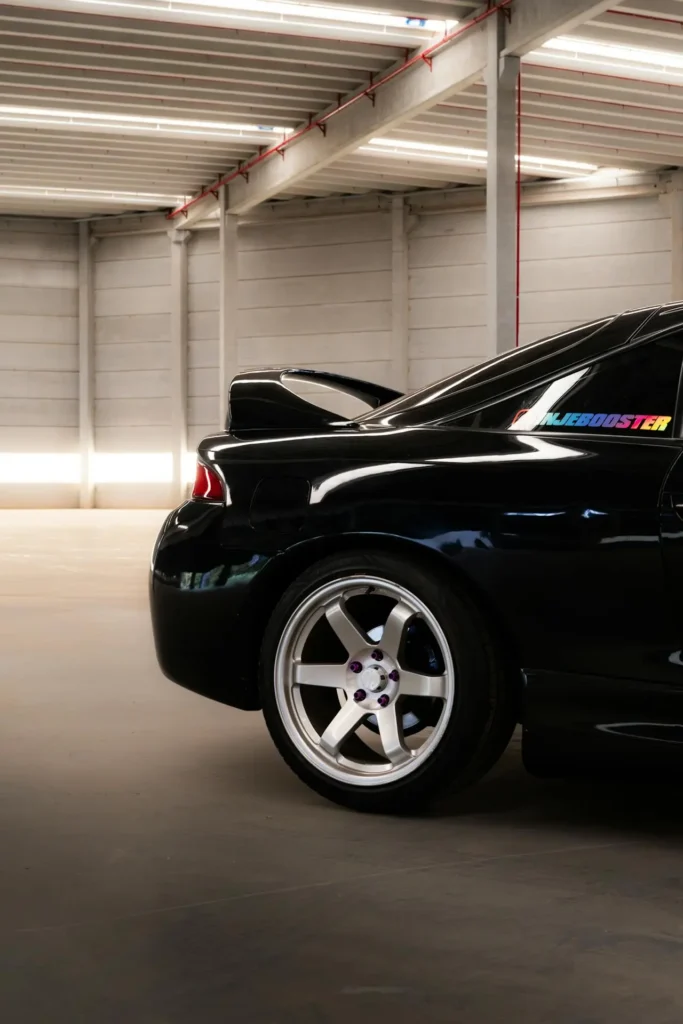
What Can’t Paint Correction Fixside view of a freshly paint corrected black sports car
In general, it helps to remember that paint correction works by removing, not replacing, material. It won’t repair: 

That being said, paint correction is a great next step for vehicles that require body work or new paint, especially if you plan to install a ceramic coating. Perfecting the freshly painted surface will maximize the reflective quality of the ceramic and lock in a pristine look. 

The Process

Paint correction is a delicate, detailed process. Here is an overview of how it works:

Step 1: Inspection and Measurement

Before anything can be done, a qualified detailing technician has to examine your paint to determine what’s possible. 

Classic cars and restoration projects can present unique challenges, as it may be imperative to preserve rare or discontinued base coat colors. Your detailer will assess:

All of these factors work together to determine how aggressive the correction can be without compromising the clear coat.

Step 2: Decontamination

Polishing over embedded debris can create additional scratches, so surfaces must be fully decontaminated before they are corrected. 

Any stuck-on metallic particles and tar are carefully removed using specially formulated chemicals. 

Step 3: Machine Polishing

Heavier abrasive pads are used to remove deeper defects before lighter ones address surface imperfections. Detailers really rely on their training and experience to choose the right pads and tools to achieve a maximally reflective surface without removing more material than absolutely necessary.  

Step 4: Refining and Finishing

Once defects are removed, the paint is refined to eliminate any unevenness that can cause it to look dull or hazy. This step brings out the depth and clarity of your base coat’s color. 

Step 5: Protection

Paint correction removes existing defects, but it doesn’t protect against future damage. This is an ideal time to apply paint protection so you get the greatest possible return out of your investment.

Trust the Correction Experts

Flawless paint correction is a mix of science and craftsmanship. A technician must factor in the thickness, hardness, and history of the existing paint in order to cleanly erase damage without causing any. 

If you’re considering paint correction, reach out to ATD to explore how our experts can achieve the best results for your vehicle. Let us help your paint live up to its potential. 

When you’ve invested time, money, and care into restoring a classic car, you want the finish to look every bit as stunning as the mechanical work beneath the hood. Even after a professional repaint, many restored vehicles need one final refinement before they truly shine.

If you want to turn back the clock on your restoration project, paint correction (especially when paired with ceramic coating) creates a brilliant, flawless exterior that may even outshine your car’s original finish. 

pink classic car with the hood lifted, showing off mechanical restoration and paint correctionWhere Does Paint Correction Belong in the Restoration Process?

After mechanical repairs and bodywork comes fresh paint. Whether you opt for a bold new look or want to replicate your car’s original finish, it’s rare to achieve perfection right away. 

Restored cars often undergo rust repair, panel replacement, or filler work before repainting. Slight imperfections left behind by bodywork, combined with the fact that the surface of a classic car is older and more worn, make for a rougher canvas than factory-new metal. 

Performed after repainting, paint correction uses specialized polishing techniques to refine the surface, remove flaws, and bring out the full depth and clarity of your paint color. Think of it as the final touch that transforms a quality paint job into a head-turning finish. 

Perfecting Your Classic Car’s Paint

Unlike automotive glazes and waxes that temporarily fill in scratches and swirl marks, paint correction is a permanent solution to imperfections. 

A skilled technician begins the process by thoroughly cleaning and decontaminating your vehicle’s exterior to ensure that no dust, dirt, or other abrasive particles will get buffed into your paint. From there, a series of polishing compounds is used to meticulously remove defects and refine the surface to perfection. 

Once any texture has been removed, light will reflect evenly off the exterior for a brilliant shine. However you plan to show offrestored classic orange VW after paint correction your restored vehicle, the results are dramatic: 
How Paint Correction and Ceramic Work Together

Paint correction sets the stage for long-term protection. Ceramic coating is the natural next step, providing a durable, glass-like shield that bonds directly to the corrected paint. 

For a restoration project that’s been a labor of love, ceramic coating extends the life of your hard work and increases the value of your classic car. Installing ceramic onto a perfected surface creates the glossiest possible finish while shielding your paint from hazards like:

Whether you plan to primarily garage your restored vehicle or take leisurely drives to your local cruise-in, paint protection is an essential step for anyone who wants to fully enjoy their finished project. 

Bring Your Restoration to Life

A restored car is more than just a vehicle — it’s a piece of history and a reflection of your passion and craftsmanship. Paint correction gives it the polished look it deserves, while laying an ideal foundation for paint protection services that safeguard its value and offer you superior peace of mind. 

If you’re nearing the end of a restoration project and want your paintwork to truly stand out, ATD Detailing can help. Our paint correction experts have the skills, techniques, and eye for detail essential for making classic and collector vehicles look their best. Contact us and give your project a flawless finish and a timeless look. 

Properly installed PPF offers drivers up to a decade of paint protection. Badly installed PPF creates instant regret. 

If you’ve ever considered installing paint protection film (PPF) yourself, you know how challenging it can be to achieve a flawless result. Though the DIY route does come with an upfront cost savings, misaligned edges, stubborn bubbles, and trapped debris can undermine your paint protection and leave your car looking terrible.

When a DIY PPF application fails, it can be hard to decide when to attempt to uninstall the film yourself and when to call in the pros. Here is what automotive enthusiasts need to know about recovering from a PPF mishap without causing expensive damage to their paint. 

Classic car with professional paint protectionCommon Problems with DIY PPF

Even very savvy, detail-oriented people can run into trouble when dealing with paint protection film. We’ve previously explored how DIY paint protection can go wrong in detail, but here are a few of the most common issues:

While these issues can be frustrating, attempting to remove the film without proper care can make matters worse.

Risks of Removing PPF Incorrectly

Unfortunately, removing failed PPF isn’t as simple as lifting a corner and peeling it off. 

If the adhesive isn’t softened properly prior to removal, chunks of your paint may come with it. It’s also common for DIYers to accidentally scratch or gouge their car’s surface with tools or damage paint with adhesive removers and other harsh chemicals. 

Just like the initial application, removal is a delicate process that has to be approached systematically. 

How to Remove Your Paint Protection

After the frustration of having a DIY film kit fail, many drivers choose to involve a professional detailing shop. If you want to try to remove your film in your home garage, here are steps to increase your likelihood of success: 

1. Gather Your Tools

Before starting, make sure you have the following:

2. Soften the AdhesiveDIY PPF kit on a luxury vehicle

Use a heat gun or hairdryer to warm the PPF. Hold the heat source 6-12 inches away and move it evenly across the surface. The goal is to soften the adhesive without causing heat damage to the paint underneath. 

3. Peel Back the Film

Start at one corner and gently lift the film using your fingers or a plastic scraper. Pull the film at a low angle (around 45 degrees) to reduce tension on the paint. Work slowly to avoid tearing the film.

4. Remove Residual Adhesive

Once the film is off, you may notice adhesive residue left behind. Apply a small amount of adhesive remover to a microfiber towel and gently rub the area. Always test the remover on a small, inconspicuous area first to ensure it won’t damage the paint.

5. Inspect the Results

Wash your car to remove any remaining adhesive or cleaning products and check for damage. If you notice scratches, swirls, or discoloration, professional paint correction may be necessary.

When to Call in the Pros

If your PPF removal isn’t going according to plan, it may be time to get help from a professional installer. Send for reinforcements if you notice that the film isn’t lifting in solid pieces, stubborn adhesive is getting left behind, or the removal process is causing paint damage. 

Certified installers have the training and equipment necessary to achieve superior results on the first try and remove failed PPF without causing further damage. When in doubt, professional detailing is the safest investment in the value of your vehicle. Reach out or visit our Garner, NC facility for expert assistance with PPF removal. 

Even though the dings and damage to your paint job may be subtle, paint correction can make a dramatic difference in the way your vehicle shines. 

Whether you’re maintaining that “new car” look with your daily driver or hoping to restore a project car to its original luster, paint correction delivers the wow-factor that car enthusiasts look for. 

If you’re curious about how paint correction works and whether it is worth investing in professional paint correcting services, here is the information you need to help your vehicle look its very best. 

paint correction shiny red carWhat is paint correction and how does it work?

Paint correction addresses minor scuffs, scratches, and imperfections in your car’s paint job by buffing out the clear coat that sits on top of the paint. 

Unlike deeper damage caused by highway gravel and runaway shopping carts, the scratches that paint correction repairs are surface-level and tend to occur in a swirl or spider web pattern that worsens over time. This damage to the clear coat causes very slight elevation changes that diffuse light to give your car’s exterior a dull and hazy appearance. 

Paint correction uses mechanical tools to meticulously buff your vehicle’s clear coat so that the surface is uniform and level. This prevents light from being unevenly reflected off of the valleys of any scratches or swirl marks, giving your paint a brilliant shine. This process is superior to products that temporarily fill in scratches with glazes and oils. 

What causes swirl marks in your car’s paint?

Many drivers assume that damage to their car’s paint job is always caused by a traumatic event. While this certainly can be true, even passive exposure to the elements takes a toll over time.

Swirl marks happen when fine particles of grit strike the surface of your car. Highway dirt and grime can attack your paint job when you are traveling at high speeds. This is particularly true for drivers in parts of the country that contend with heavy winter snows and road salt. 

In addition to the hazards you encounter on the road, one of the biggest causes of unsightly swirl marks is improper washing techniques. Using abrasive materials to wash your vehicle or scrubbing particles of grit into the surface with a dirty rag will damage your paint. 

Unlike deep scratches and chips that leave your car vulnerable to rust, these slight scuffs are usually imperceptible at first. As they build up over time, however, they will noticeably dampen your vehicle’s shine. 

What are the benefits of paint correction?

Some level of paint damage is an inevitable part of car ownership. Paint correction can turn back the clock to help protect your vehicle’s finish and give it a like-new luster.

Even brand new vehicles can benefit from paint correction. Minor top coat imperfections are extremely common on vehicles shipped directly from the factory. 

During transport, vehicles are often exposed to harmful elements like plastic temporary wrapping or rough handling. These vehicles may have spent time in a shipping container, on a car hauler, or out in an open parking lot for storage while they awaited transport. They also may have been subjected to poor cleaning techniques or an automated wash process in preparation for delivery. 

While dealerships specialize in selling vehicles, and they don’t specialize in protecting or detailing them. For this reason, connecting with a service professional in the automotive paint protection industry is an important part of purchasing a new vehicle.

Paint correction restores your car’s shine.paint correction wiping car

The most obvious benefit of paint correction is aesthetic. As automotive prices continue to rise, more and more drivers are looking for ways to fall in love with their cars all over again. 

Professional paint correction can turn back the clock and revitalize the shine your car had when it was brand new.

Paint correction improves resale value.

Showcasing your vehicle in the best possible light can help you get top-dollar when it comes time to sell. A clean, shiny car will fetch the highest trade-in value, so consider paint correction alongside other detailing before you take your car to market. 

Paint correction provides a foundation for protective coating.

Paint correction provides a smooth surface that can serve as an ideal foundation for PPF or ceramic coatings that further protect your vehicle’s paint. Because paint protection works by removing a thin layer of your car’s clear coat to create a perfectly smooth surface, it’s important to replace the protective coating that gets removed. A professional automotive detailer can install paint protection film so your car keeps looking brilliant.

Can I do my own paint correction?

Paint correction takes a great deal of skill and attention to detail. While it is possible to pull off paint correction in your home garage, the tools and equipment you need to do the job correctly are expensive. This, in combination with the risk of costly mistakes, makes an attempt at DIY paint correction cost-prohibitive for most car owners. 

Professional automotive detailers have the skills and tools they need to create a perfectly smooth, light-catching surface that will give you the show-stopping results you’re looking for. Find a reputable detailer to do the job right, and prepare to be amazed by how your vehicle shines.


Ceramic Coating, Drying your car right, PPF, Paint Protection

How to Dry Your Car Safely

Washing your car, truck, or SUV every few weeks is recommended – regardless of where you live. But how do you dry your car safely? Some people swear by blowing standing water off with air, others use a drying aid such as a ceramic boost spray, then using a regular towel. However, using the wrong type of towel or material can be just as harmful as leaving that dirt and debris on the car’s paint job.

When you spend thousands of dollars on a paint protection solution, you want to protect that investment – right? With that said, using the right washing materials and techniques is by far, the best way to reduce developing a water spot, scratching, and improving the look of your vehicle.

The video in the car detailing and maintenance series posted on the Ceramic Pro YouTube.com channel focuses on how to dry your vehicle correctly. Whether you have a Ceramic Pro 9H coating, KAVACA PPF or the vehicle is unprotected, using a super plush microfiber drying towel is the best solution.

So – take a few minutes to watch this video by Adam Cote, as he explains why it’s crucial to end your car maintenance washes with drying it safely.

Why Should a Car Should Be Washed Every Two Weeks?

Over time, debris starts to collect on top of the vehicle surface and can cause damage to the paint, windows, plastic trim and more. Even if you have the highest quality ceramic coating or paint protection film installed, contaminants like industrial fallout, animal toxins, or other stuff can start to break down the integrity of the protective layer.

To maintain the quality of your nano ceramic coating or PPF installation, hand washing your car every two weeks using the two-bucket method is strongly suggested. The final step in this – or any type of car wash, is drying.

There are several options for drying a vehicle – but only a few that are proven to reduce scratching or damage to the surface. Some drying techniques or materials might seem safe – or have been used in the past – but can create swirl marks or etching in the clear coat or other materials on the vehicle’s exterior.


The Myths About Drying with a Chamois

If you’re an old-school car guy like me, it’s quite possible you were raised on using a sheepskin chamois as your car drying towel of choice. For those who need a refresher, a “shammy” has two qualities that makes it good for absorbing water.

First, it’s got a lot of surface area of soaking up water. This is due to having a large nap – also the material of the chamois. Most modern chamois are made from sheepskin, but there are some that are synthetic. Either way – the material is a good soaker of water. The second attribute of chamois is the ability to release water or to ‘wring it out’.

The problem is chamois essentially spreads water across the surface, but also creates suction on the paint. This eliminates the cushion – which grabs any remaining dirt, dust, or debris and etches it on the surface. This is how most scratching on a vehicle during washes occurs.


Why is Using a Squeegee a Bad Idea?

The other common method of car drying (by so-called expert detailers) is using a squeegee. This is basically the same type of product you’d use to wipe off standing water from glass or a window. While it works great on hard glass – it’s basically a scratch waiting to happen on a coated, protective film, or waxed vehicle surface.

There are multiple types of squeegees used by some car enthusiasts – but they all replicate the same potential of damage as the synthetic chamois. It creates suction to remove the water – but will also spread those damaging particles remaining on the surface. By comparison, a microfiber cloth is designed to glide over the surface and scoop up liquid. While it’s assumed you’ve removed all the dirt and debris during the wash process, there are still tiny particles remaining.


The Super Plush High GSM Microfiber Drying Towel

In the image below, you can see how the design of microfiber helps to scoop and pick-up debris vs spreading it across the surface.

Most microfiber towels are designed for detailing tasks – like removing polishing or liquid wax/spray coatings. But drying towels are much different in design. The drying towel is typically a higher GSM – or grams per square meter. This means they are heavier and can absorb more liquids. Since water is extremely ‘heavy’ – using a microfiber towel that has a GSM above 800 is strongly recommended.

You can also use a microfiber waffle weave drying towel. However, the terry weave super-plush drying towels will give you an ultra-dry car much better than a natural chamois. Whatever you do – NEVER use paper towels to dry your car.


What About Blowing Air Off the Surface?

There is another safe way of drying a car after a wash – blowing off with air. However, there is a catch. The method you use for blow drying a vehicle is extremely important to consider. Some larger detailing shops have an in-house compressor that they’ll use to blow air from those small nooks and cranny’s – like on door jams and window seals.

The problem with using air compressors is the oil inside the lines that blow onto the vehicle surface. Even shops with filters in the air lines can still contain tiny particles of lubricants that can spread on the freshly cleaned surface.

If you’re going to dry with air, use an electric-powered leaf blower. This will help blow off standing water – and allow you to use a microfiber drying towel for the final wipe down.

Still Have Questions Or Wish to Learn More about ATD Detailing?

If you’re thinking about having a professional detailer such as, ATD Detailing, install Ceramic Pro 9H coatings to the inside or outside of your vehicle, or Paint Protection Film – click here to request a free estimate.

When going to an auto detail shop in need of paint correction, the most important factor is finding a shop that you know you can trust.

You want a shop that uses reputable products and techniques that will give you the best paint correction possible, especially if you are considering installing  Clear Bra or Ceramic Coating. With paint correction you want to make sure you’re using technology that will give you the best result possible, which means using Diminishing Abrasives. Diminishing Abrasives essentially are polishes that when exposed to friction will break apart. While the product might start in a larger grain, as it is worked it becomes finer and finer. This does wonders when correcting paint defects.

Raleigh Auto Paint Correction Tools

It does take more elbow grease, but the end product looks better. The polishes we use are best installed by professionals who know when the polish has hit its sweet spot. The tools used also affect the result drastically. Here at ATD Detailing Inc we use RUPES polishers, which have an impeccable reputation in the industry. RUPES has completely changed the paint correction process. Their tools don’t create a swirl or hologram which makes it much more possible to use the Diminishing Abrasive technology successfully.

We know that you want your vehicle to look the best it possibly can, and that means spending time and money on the treatment it needs. We take the time to make sure your vehicle looks as good as possible when it comes out of our shop. If you decide to take that step and get a ClearBra treatment or Ceramic Pro, that means making sure there is as little or no damage to your paint as possible. We only use the latest and greatest technology to make sure your vehicle drives off our lot good as new.